


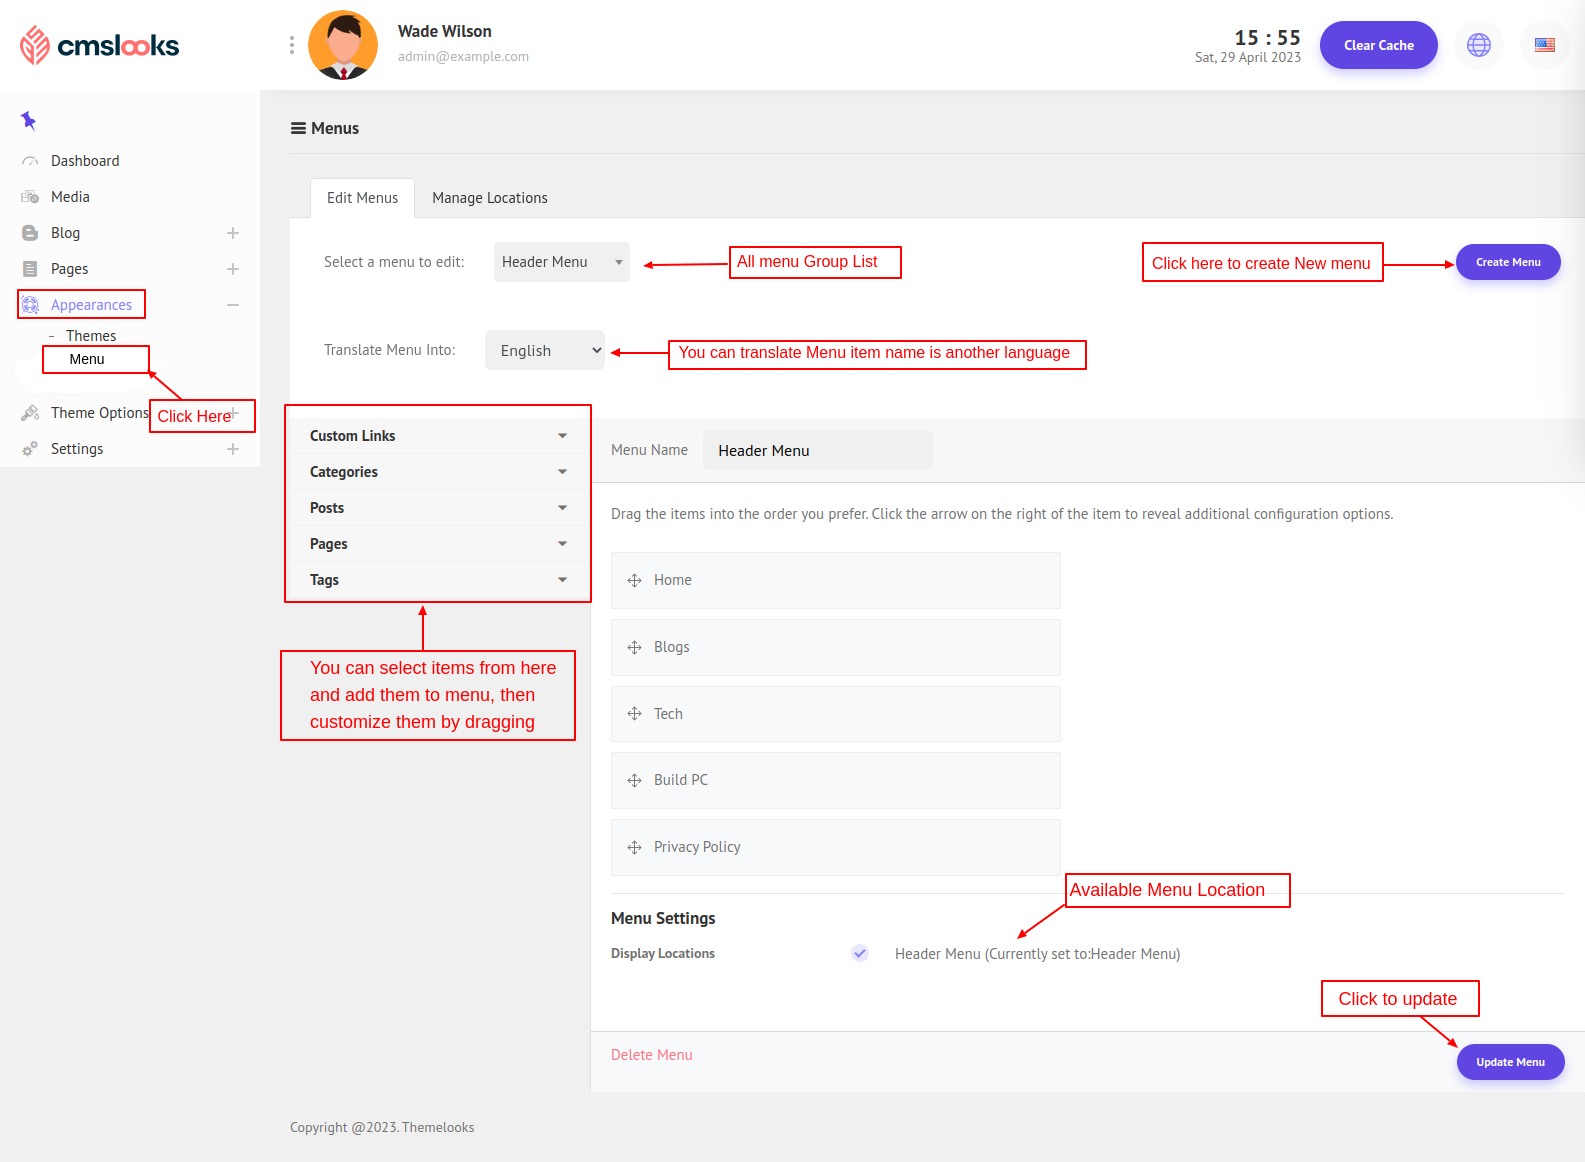
To manage Menus, Follow Appearances > Menus.
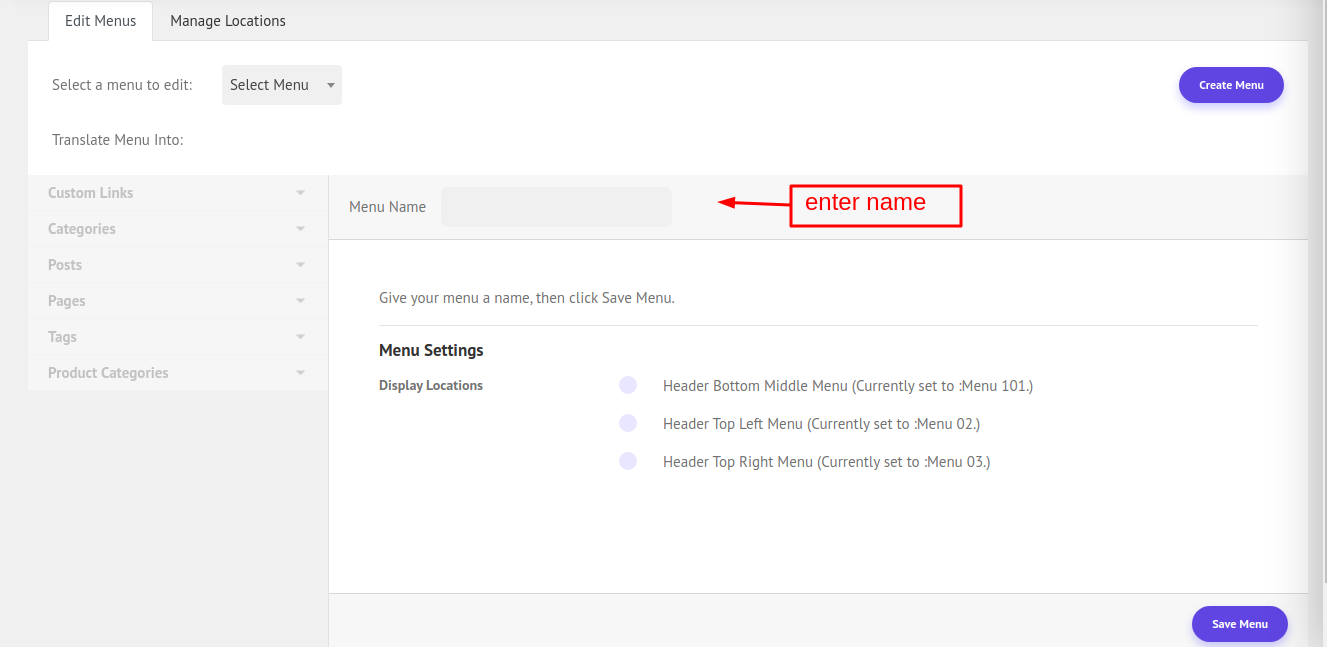
- Here on this page, you can create a new menu by clicking Create Menu. Then an interface like the below image will appear and you can set the menu name, select the menu location if you want, and click save menu.
- You can change to another menu by selecting them from Select a menu to edit dropdown.
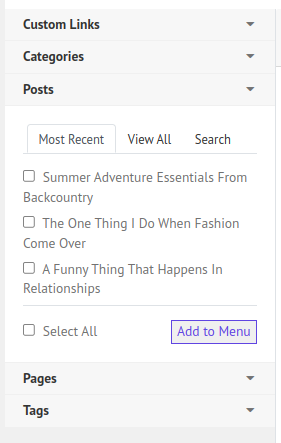
- Select items from the left sidebar and add them to the menu. You can create custom links and add them to the menu. You can also select Blog Categories, Blogs/Posts, Pages, Tags, and Blog tags. You can find them by most recent, view all, and also can search them. Then select one by one or select all then click add to the menu to add them to the selected menu.
- You can drag the item to create a multi-level menu.
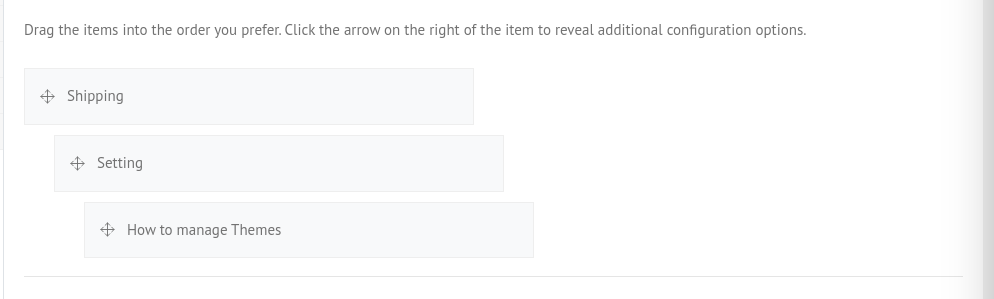
- You can also sort the menu item in order by dragging them.
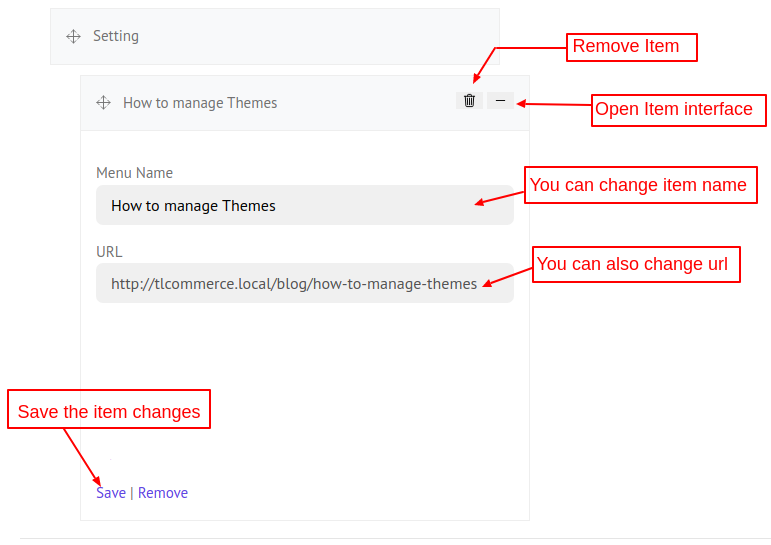
- You can manage each item by clicking on the + icon. you can also remove items from the menu.
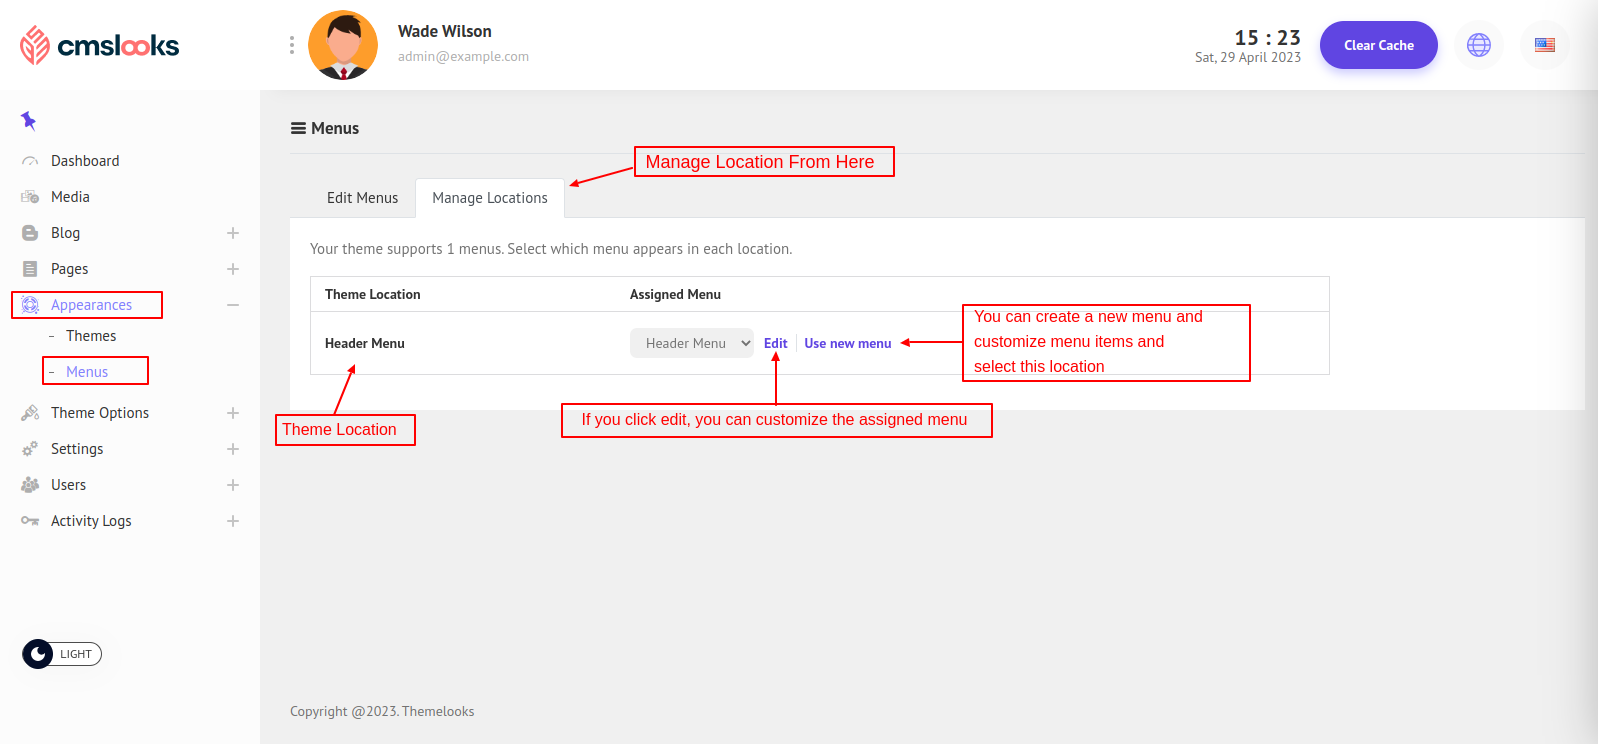
- You can delete a menu by clicking Delete Menu Button. You can assign a menu to the three header location and save it.
- Click Manage Locations from the top, here you can see which menu is assigned in which locations.
- Now you can also translate the menu item name into another language. Select a language from Translate Menu into dropdown and change the menu name to another language and click save. Now when a user changes the language, and if the menu has any translated value in that language, then the menu will show the translated values for that selected language.