


In this post, we will learn how to build our website's, Home Page. Follow Theme Options > Home Page Builder.
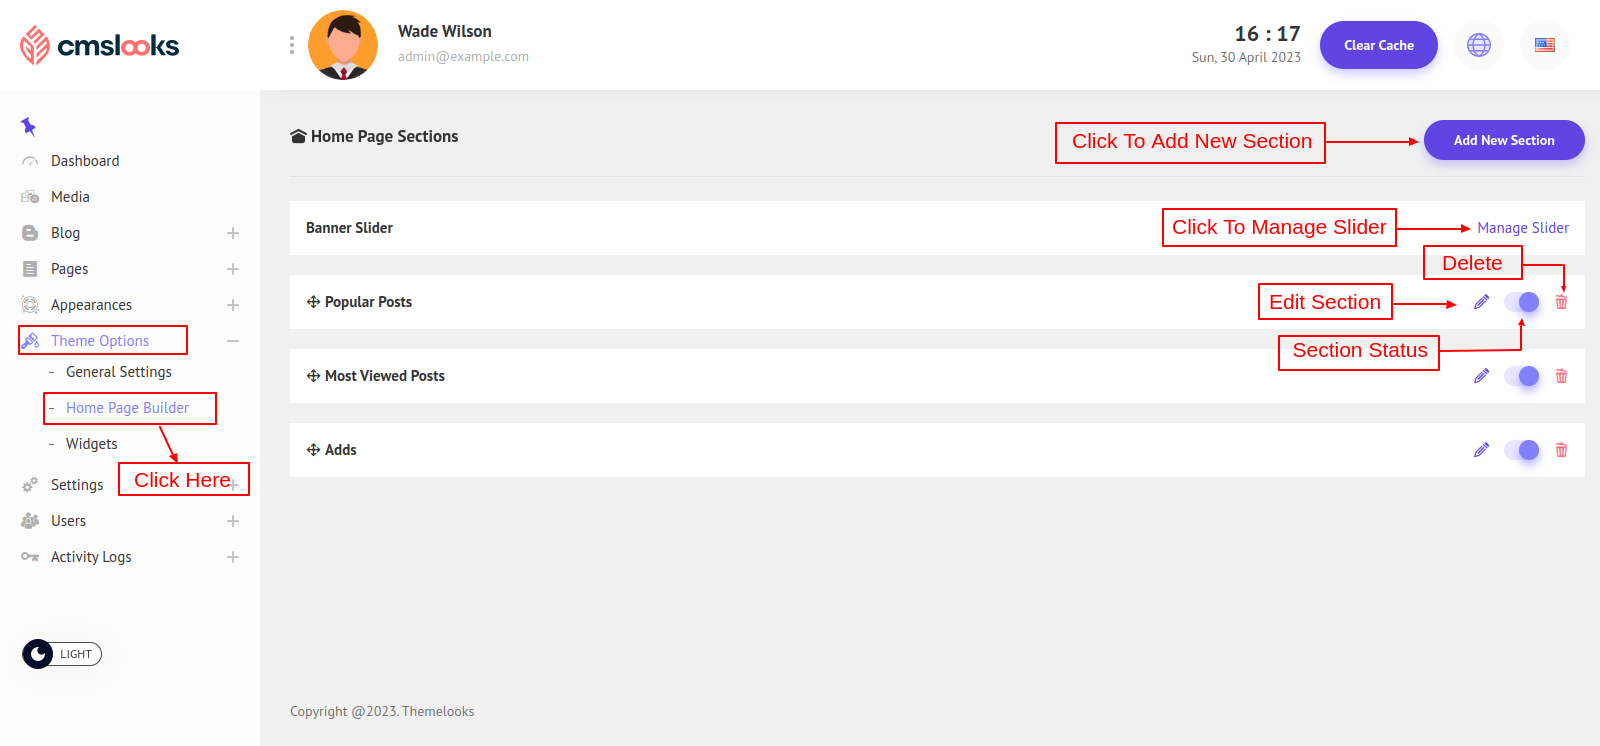
On this page, you can see the home page sections.
- First, there is the banner. The Banner is the first section of the home page. You can't remove this section. Click the Manage Slider link and you can customize the banner section with styles or which type of blog to show.
- Under the Banner, all the home page slide sections are available. You can order them by drag and sort.
- You can also edit a section if you click the edit button, change the section status, and also delete a section.
Now before all that, let's first create a new section. Click Add New Section button, and you will be redirected to another page.

On this page, you can see that there are only two sections. Section Layouts and Section Properties. Here in the section layouts, there are 6 different options for a section. You can select any of them and all the related properties for that layouts will be available on the right side.
Now we will learn about all 6 different options.
1. Ads: If you select ads as section layouts, a preview image of how it will look will be placed under the select dropdown, and all the ads-related properties will be available on the right side.
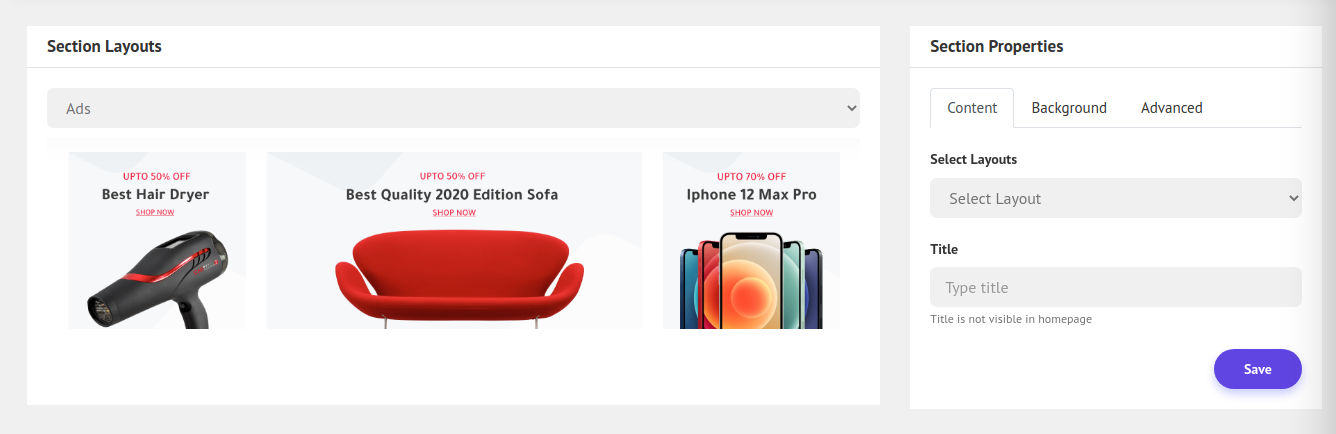
As you can see in the upper image, in the Section Properties all the Ads properties are available. There are 3 tabs Content, Background, and Advanced.
Content Tab: There are only two content fields for Ads.
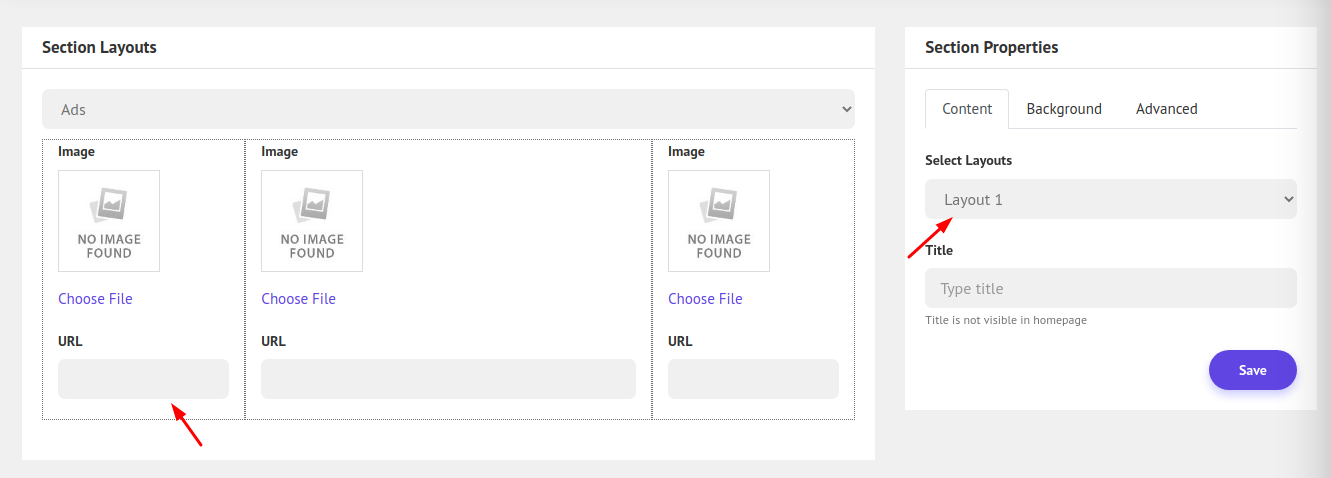
- Select Layouts: Here you can select in which layout you want to set the Ads section. For example, if you select Layout 1 a preview layout will appear on the right side. You have to set the image and the URL for each image section. Each layout is different, so you can choose what you want.
- Title: The title field is for the section name to identify it, it will not show on the home page.
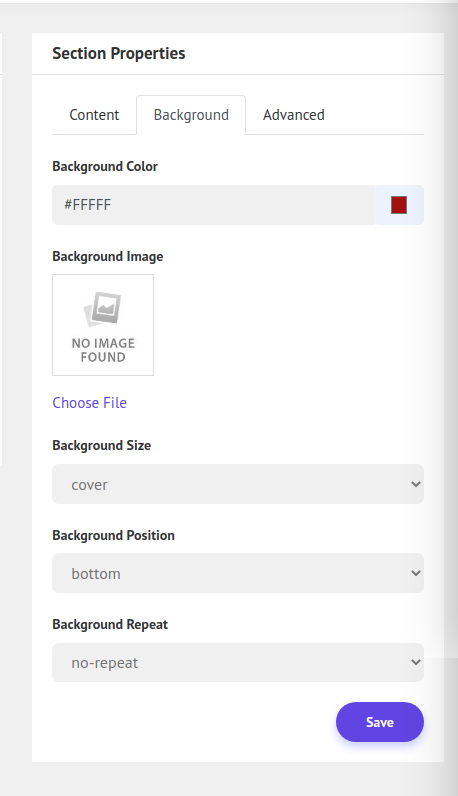
Background Tab: Background fields are for section background styles. You can set the background color, image, size, etc.
Advanced Tab: Advanced is for some additional styles like section Margin and Padding.

*Note: Background and Advanced tab property fields will be the same in all 6 different options.
So, after filling in all the necessary fields click Save to save the section.
now
2. Latest Blogs
3. Featured Blogs
4. Most Viewed Blog
5. Trending Blogs
All of these options share the same style. You can choose which type of blogs you want to make the section. a preview image of how it will look will be placed under the select dropdown, and all the blog-related properties will be available on the right side.
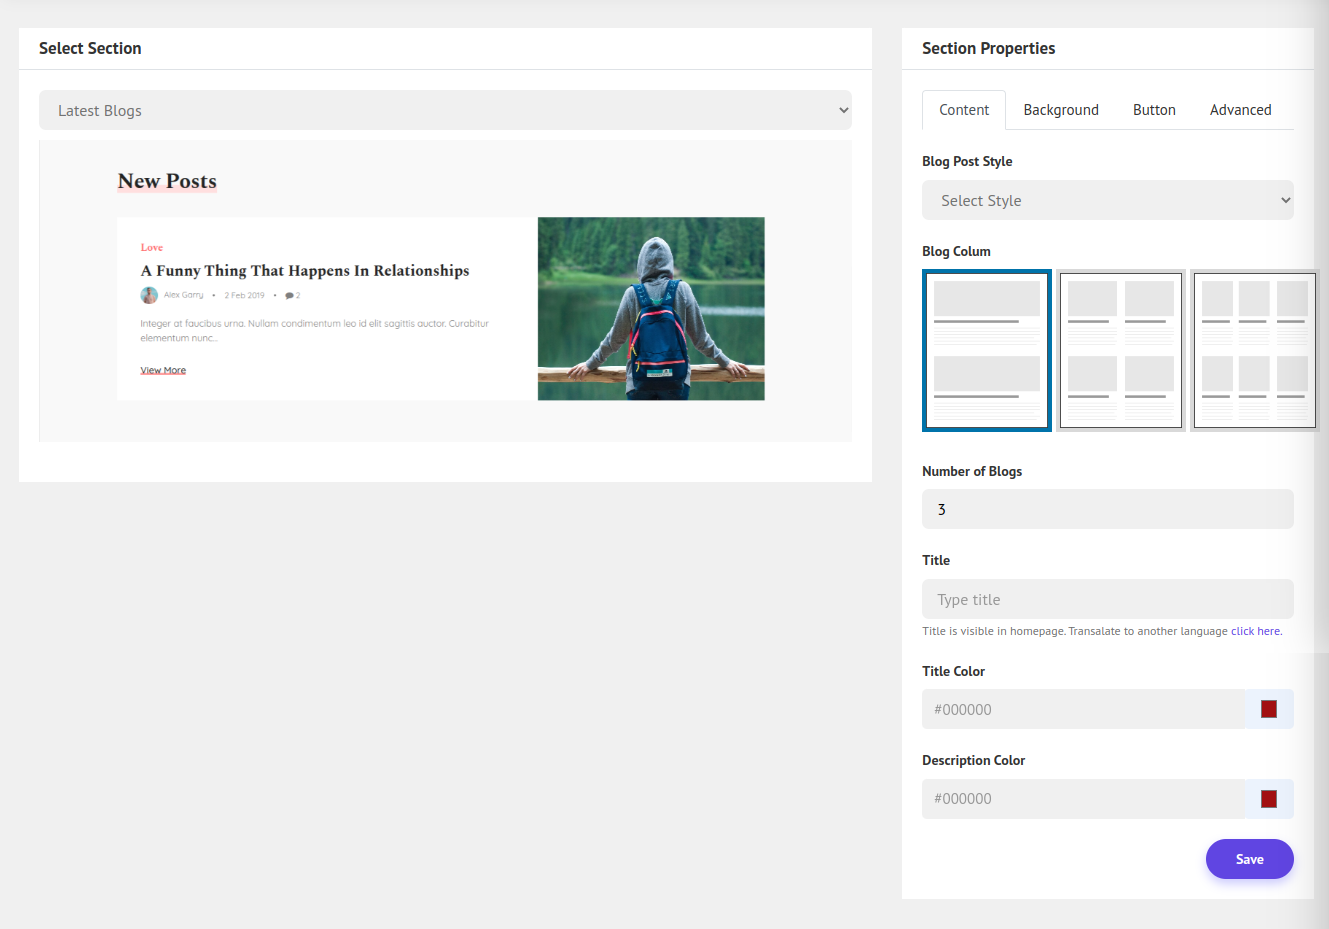
As you can see in the upper image, in the Section Properties all the Blogs properties are available. There are 4 tabs Content, Background, Button, and Advanced. Background and Advanced are the same as Ads, so you know how these fields work. Let's see at Content and Button.
Content Tab: All the major fields for the blog are here.
- Blog Post Style: Here you can select which type of post style you want. A preview of that style will be visible on the left side.
- Blog Colum: Here you can select how many columns you want to show in a single row.
- Number of Blogs: Set a total number of blogs to show.
- Title: Set the section title.
- Title Color: You can set the title color of a post.
- Description Color: You can set the description color of the post.
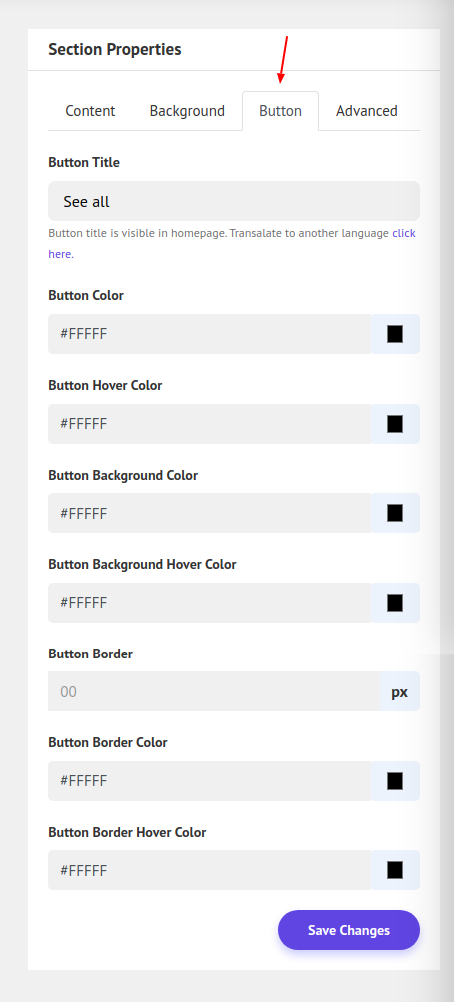
Button Tab: This is for the button styles. You can set the Button title and all other colors.
Now after all those fields fill in click Save to save the blogs section.
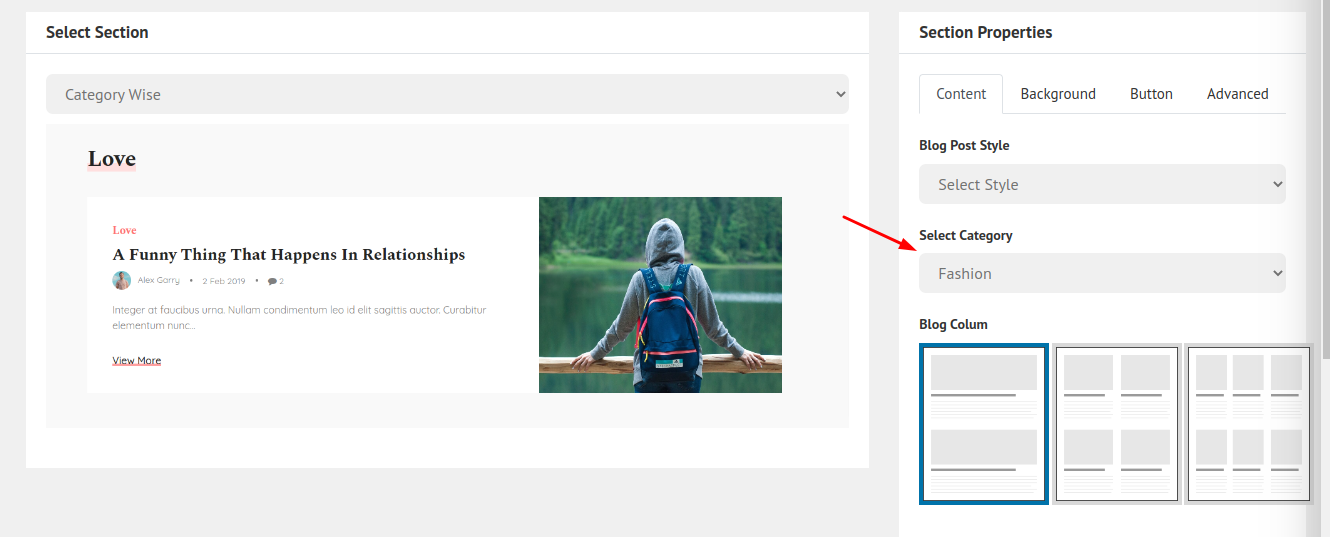
6. Category Wise: This section is also the same as other blog sections. But there is an extra field in content to specify which category blog it wants.
Now after all those fields fill in click Save to save the new section.
Now let's manage Banner Slider. Click Manage Slider.
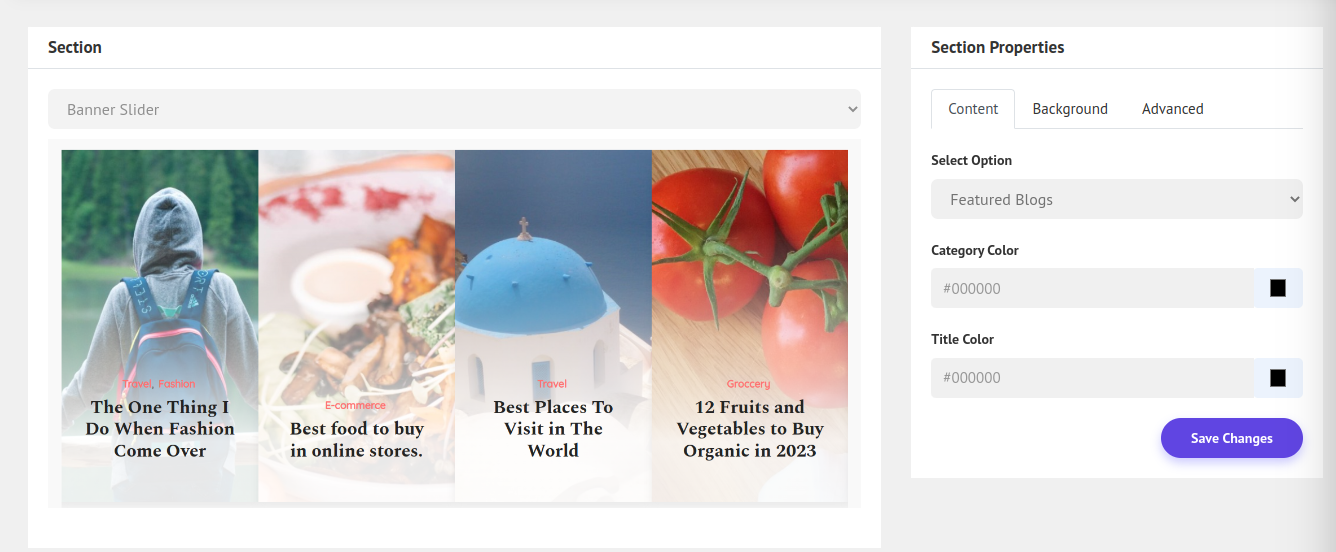
Here you can customize the banner section as you like. From Select Option, you can choose which type of blog you want to show in the slider. Also can set other styles. Now click Save Changes to save the banner styles.